Example Project for a Landscape Deployment on Codesphere
This template utilizes Codesphere's new Landscape Deployment feature, which allows us to deploy complex monorepo applications.

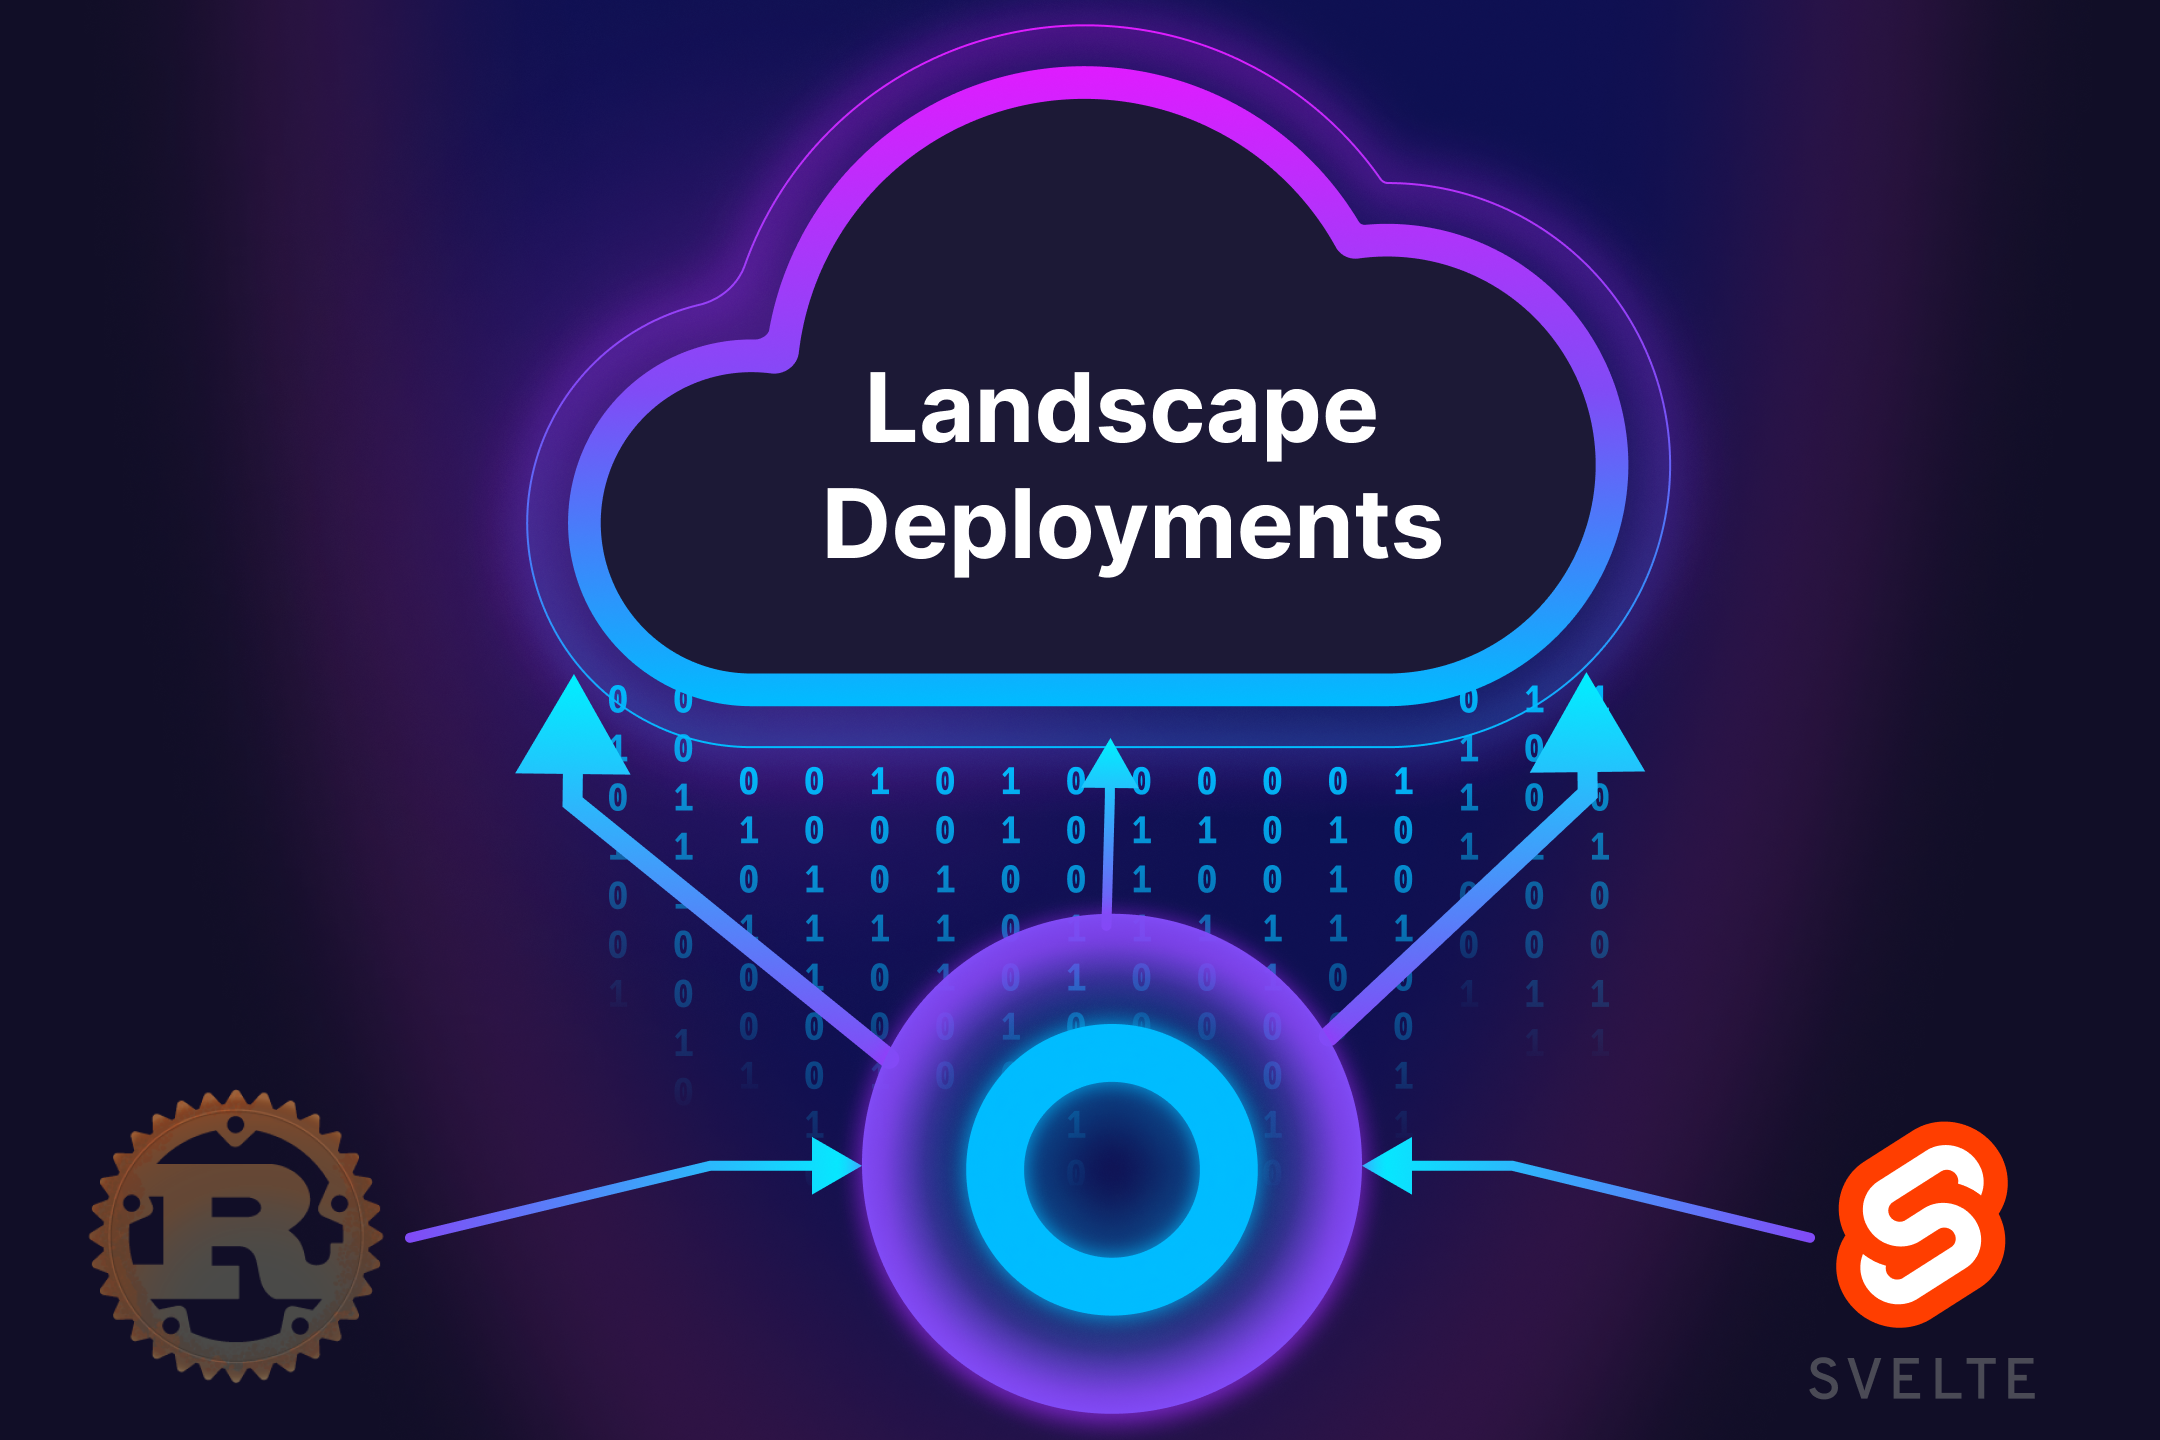
Recently, Codesphere released a new feature in public beta called Landscape Deployments. This feature allows users to deploy complex landscapes of services that can scale horizontally and vertically independently. With this feature, you can deploy your multi-service application without the tedious configuration of Kubernetes clusters.
One use case where this feature comes in handy is deploying a web application that separates a backend component and a frontend component into different services. In this blog post, we will show you how to deploy a Landscape Deployment during the public beta phase. Furthermore, we will highlight what you need to take care of when deploying multiple services using this new feature.
As an example project, we have a Svelte frontend as one service and a Rust backend as another service. You can find the source code in our curated list of example projects in our template GitHub repository and template gallery.
Creating a Landscape Deployment workspace
Since Landscape Deployment is in public beta, we need to "activate" this feature when creating a new workspace. There are two ways to do so:
- Using the migration button: Next to the CI Pipeline config editor you will find a
migrate to landscapebutton that converts your existing config to a landscape config with a single service. You can then review the settings and confirm the update. Please make sure to commit the updatedci.ymlto your repository.

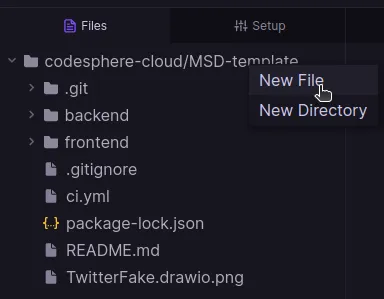
- Creating a custom CI.yml file: First, you need to create a new file in your file tree, which can be named anything. I suggest creating a
ci.txtfile. You can either create a new file in the terminal with thetouch ci.txtcommand, or you can right-click on the file tree and select "New File."
- Then you need to copy this code snippet and paste it in the file and save the changes
schemaVersion: v0.2
prepare:
  steps: []
test:
  steps: []
run: {}- If you have an existing
ci.ymlfile, you need to delete it. If this existingci.ymlcontains important code that you don't want to lose, you can rename thatci.ymlfile to any.txtfile so you can read its content. - Next, rename the
ci.txtfile we just created toci.yml. Now, Codesphere can parse theci.ymlfile correctly, enabling you to use Landscape Deployment.

Now you can utilize the public beta release of the Landscape Deployment CI Pipeline. In the next section, we will guide you through setting up such a multi-server deployment using our simple "Twitter clone" template, which exists solely to showcase how Landscape Deployment operates on Codesphere. Here is the source code for that template:
Link: https://github.com/codesphere-community/landscape-twitter-clone
Setting up a Landscape Deployment Ci-Pipeline
Let's get started by creating a new workspace in Codesphere. You can simply copy this link and paste it into the text field when creating a new workspace. This will set up this template directly in your workspace upon opening it:
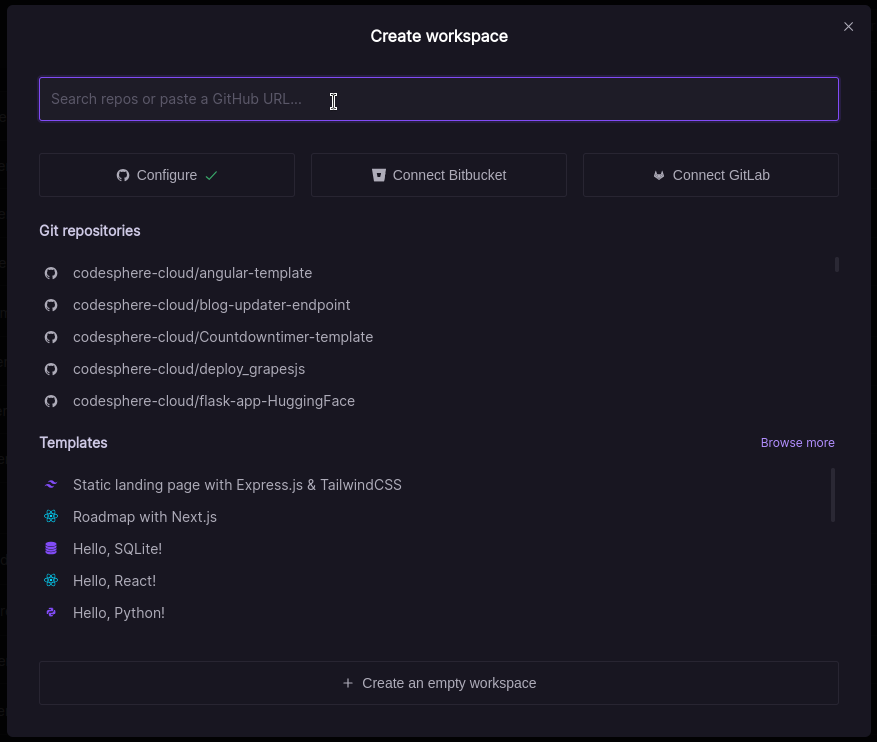
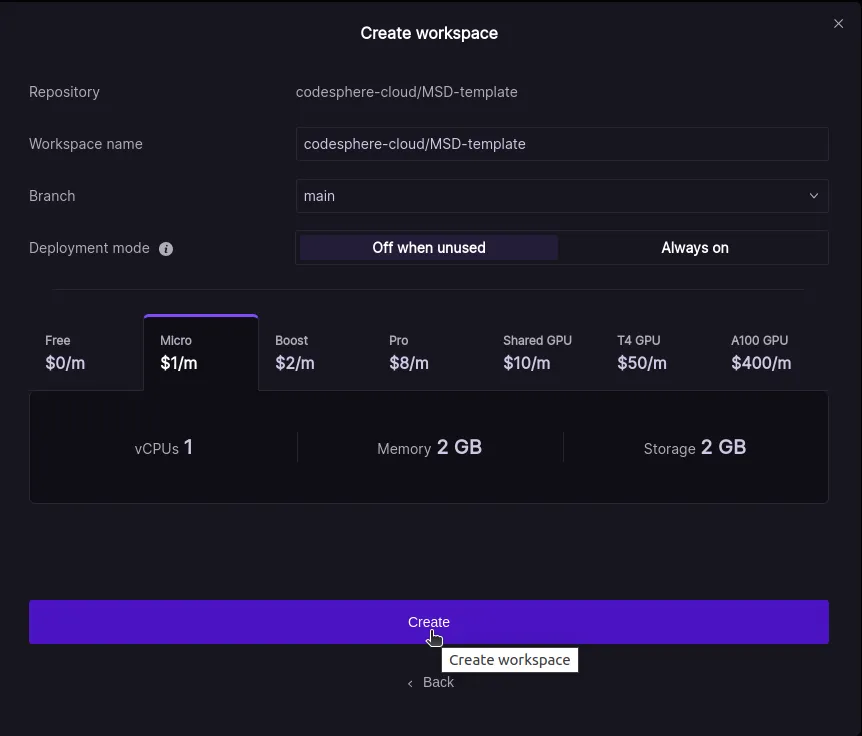
After pasting this link into the field, you can select any plan you prefer.
When your workspace is set up, if you see that your CI pipeline needs to be synced, simply click the sync button to synchronize it.
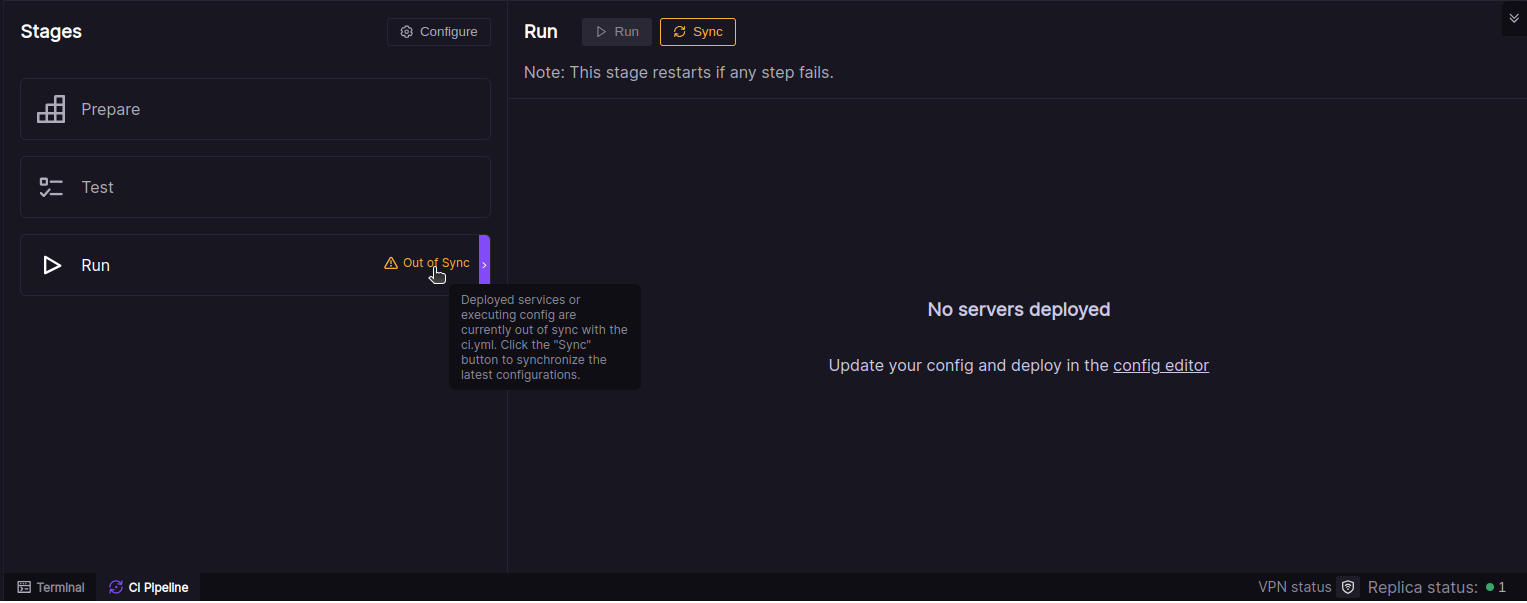
When you click on the sync button, a modal will open listing all your services to be set up in your Landscape Deployment configuration. Every time you make changes to your CI pipeline, this modal will pop up and inform you if there will be any changes to your billing with this new configuration of your CI pipeline.
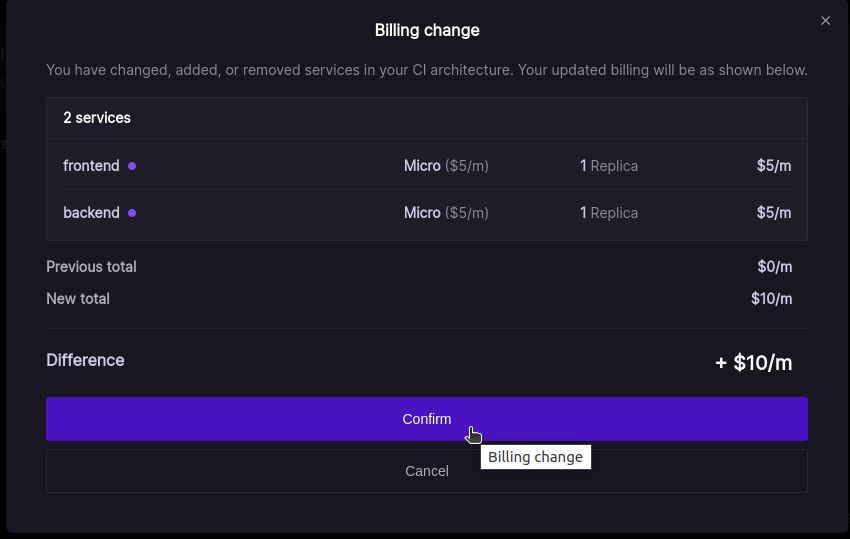
When you confirm this modal, your Landscape Deployment setup is approved, and the changes will be applied within a few seconds:
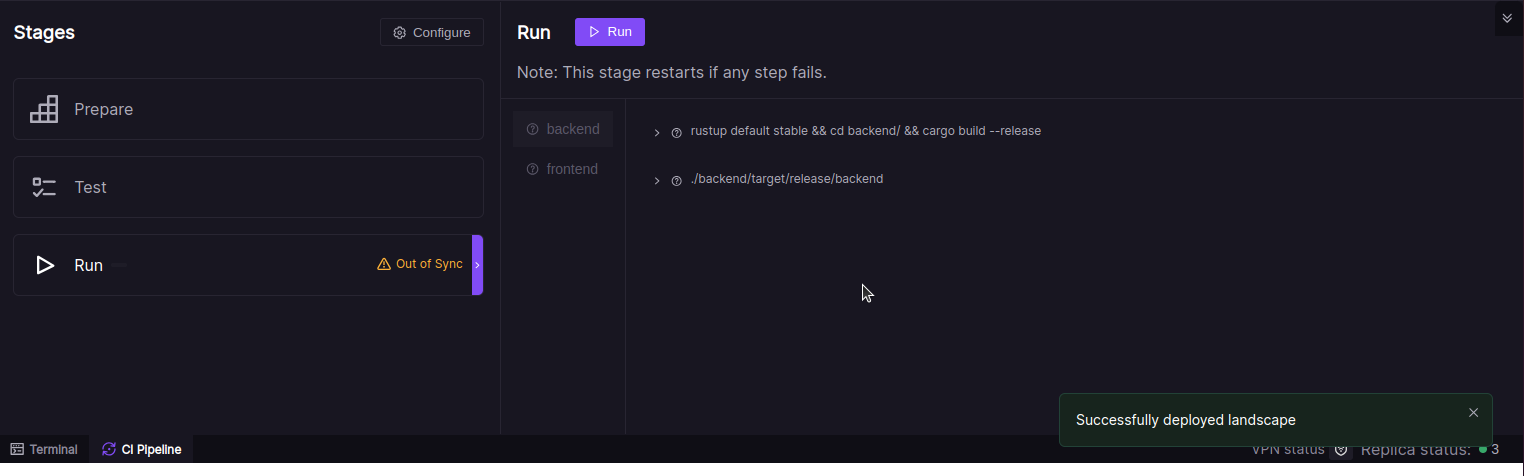
Now your CI pipeline is ready to be used. Let's take a look at our project.
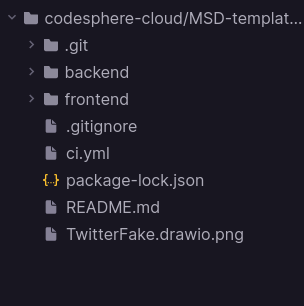
This project is organized as a Monorepo, which means that every service has its own directory. Here, we have two services: one frontend service and one backend service. Before we introduced this Landscape Deployment feature, you would need to separate those directories and open two separate Codesphere workspaces for each service to run this web application. Now, we have one workspace for both services, and you can use both services under the same domain.
In the CI pipeline, the prepare and test stages do not differ from the previous CI pipeline. The only thing you need to keep in mind is that if you need to install any dependencies or execute tasks in the prepare or test stages, you need to consider all your services within this single CI pipeline stage.
Let's take a closer look at our new run stage. Each service you see here functions like a separate Codesphere workspace:
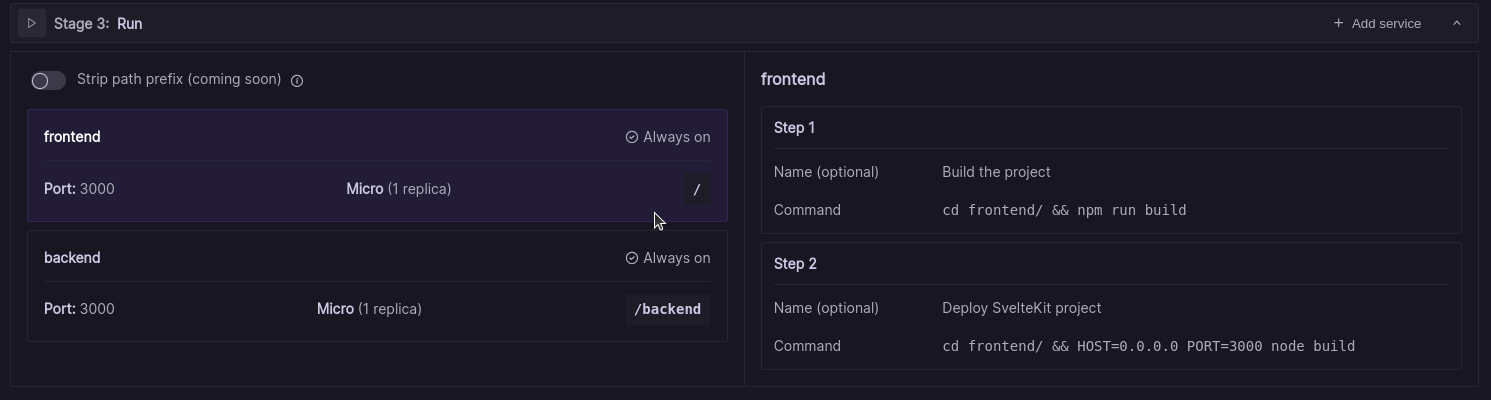
When creating a new service, you need to consider a few things:
- Your service must have the same name as the corresponding directory in your monorepo.
- The path to this directory doesn’t necessarily have to match the corresponding service name. For now, all of the routes exposed by this service need to include this path in their code.
- Each of your services has its own pipeline steps. When starting the run stage, all pipelines execute separately and independently. Even if one service crashes, the other pipelines keep running.
With that in mind, we can develop our application according to the behavior of this Landscape Deployment configuration. As you can see, our backend service is running under the /backend path. To expose our REST API endpoints correctly, we need to define them under any path with /backend as a prefix. Here is a code snippet from the main.rs file where we define an endpoint for our REST API:
#[get("/backend/tweets")]
async fn get_tweets() -> impl Responder {

    let mut connection = establish_connection();

    let tweets_with_users = tweets_dsl::tweets
        .inner_join(users_dsl::users)
        .select((
            tweets_dsl::id,
            tweets_dsl::userId,
            tweets_dsl::title,
            tweets_dsl::likes,
            tweets_dsl::dislikes,
            tweets_dsl::text,
            users_dsl::name,
        ))
        .load::<TweetWithUser>(&mut connection)
        .expect("Error loading tweets");

    HttpResponse::Ok().json(tweets_with_users)
}
Without the /backend prefix, our endpoint wouldn't work because our frontend is exposed at the root path.
Before we start our CI pipeline, we need to add a new environment variable to our workspace so that our Rust backend knows where our SQLite database is located.
The key needs to be:
DATABASE_URLand the value needs to be:
sqlite://backend/FakeTwitter.db
One more thing to consider is to set up both services to listen on host 0.0.0.0 and port 3000. It may seem unusual to run multiple processes on the same port, but in our Landscape Deployment setup, each service runs as a separate replica. Every service will be running on host 0.0.0.0and port 3000 and Codesphere handles internally the distribution of traffic.
In our Rust backend component we set that up in our main function in the /backend/src/main.rs file:
#[actix_web::main]
async fn main() -> std::io::Result<()> {
    HttpServer::new(move || {
        App::new()
            .app_data(web::Data::new(establish_connection()))
            .service(create_user)
            .service(get_user_by_id)
            .service(get_users)
            .service(update_user)
            .service(create_tweet)
            .service(get_tweets)
            .service(like_tweet)
            .service(dislike_tweet)
            .service(create_comment)
            .service(get_comments_for_tweet)
            .service(hello)
    })
    .bind("0.0.0.0:3000")?
    .run()
    .await
}
While in our Svelte frontend component we have to modify the frontend/vite.config.js file to change the host and the port:
import { sveltekit } from '@sveltejs/kit/vite';
import { defineConfig } from 'vite';

export default defineConfig({
	plugins: [sveltekit()],
	server: {
    port: 3000,
	host: '0.0.0.0'
  }
});
Now our CI pipeline is ready to be started. When we initiate the run stage, each of the services boots up independently and separately. This allows each service to scale independently. Also, if one of the services crashes, only the affected service is shut down, while all other components continue to run. This improves application uptime in case of service failures.
In the following image, you can see the result: with the root path /, you can access the frontend service, and with the /backend prefix, the backend service.
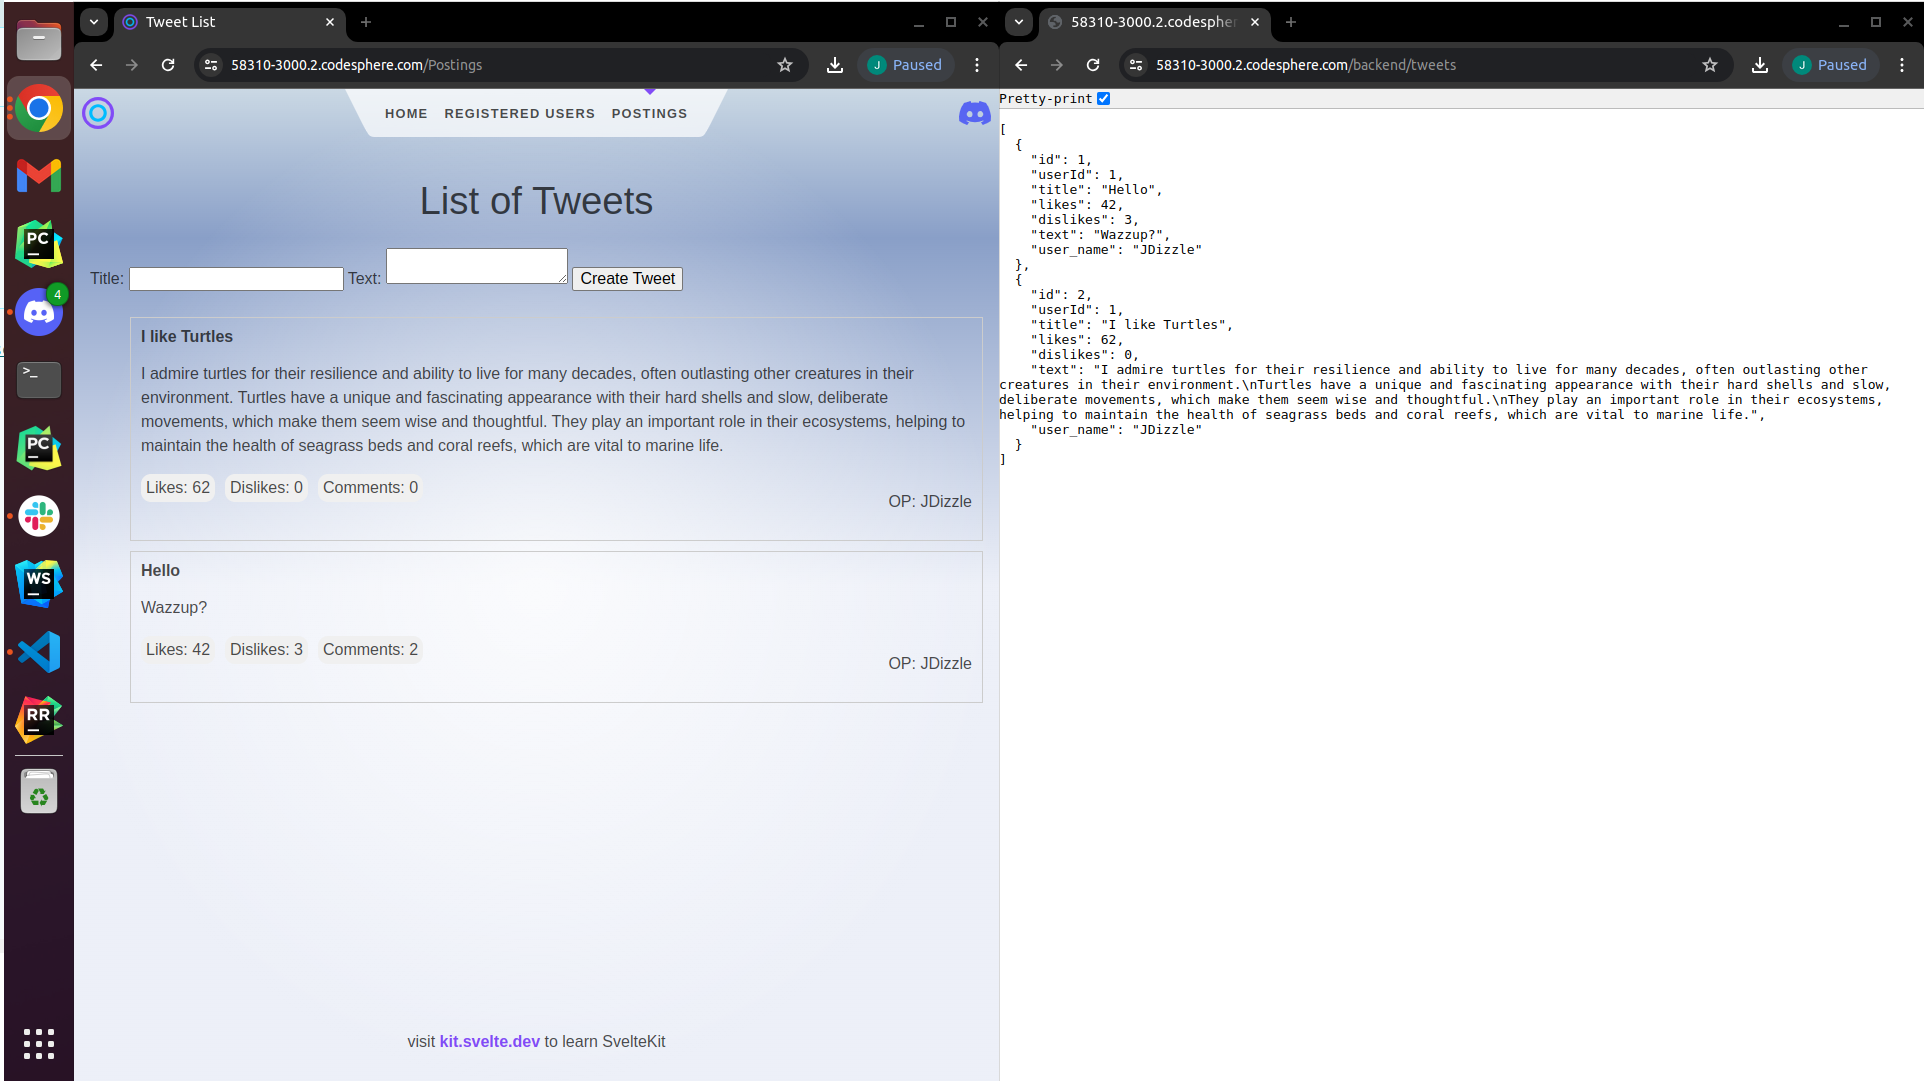
Result
Now we have a simple multi-service web application running in the cloud, organized in a single monorepository. This is a basic example demonstrating how to utilize the new Landscape Deployment feature during its public beta phase. With this Landscape Deployment feature, you can deploy much more complex applications with numerous frontend and backend services. In the future, it might even be possible to deploy Codesphere within Codesphere!
If you want to try this new feature, you can join our Discord channel and contact us: https://discord.gg/codesphere