Create a Slack Bot with NodeJS
In this tutorial, we’re going to be using NodeJS to create a Slack Bot which you can customize to handle HR operations, pull data, or just…

Intro
Platforms like Slack, Teams, and Discord have become much more than just a communication mechanism. In the world of remote work, these platforms become the very venue through which our teams operate.
In this tutorial, we’re going to be using NodeJS to create a Slack Bot which you can customize to handle HR operations, pull data, or just create a more enjoyable slack experience for your team.
If you’re interested in learning how to create bots on other communication platforms, let us know down below.
Project Setup
Our project file system is going to be relatively simple. We’re just going to need a standard node project which we can initialize with:
npm init
Let’s then add Slack’s Bolt API for creating Slack Apps:
npm i @slack/bolt
Finally, create a file called index.js
Next, we need to actually register our app with Slack. To do this, visit https://api.slack.com/apps/
And create an App from scratch.
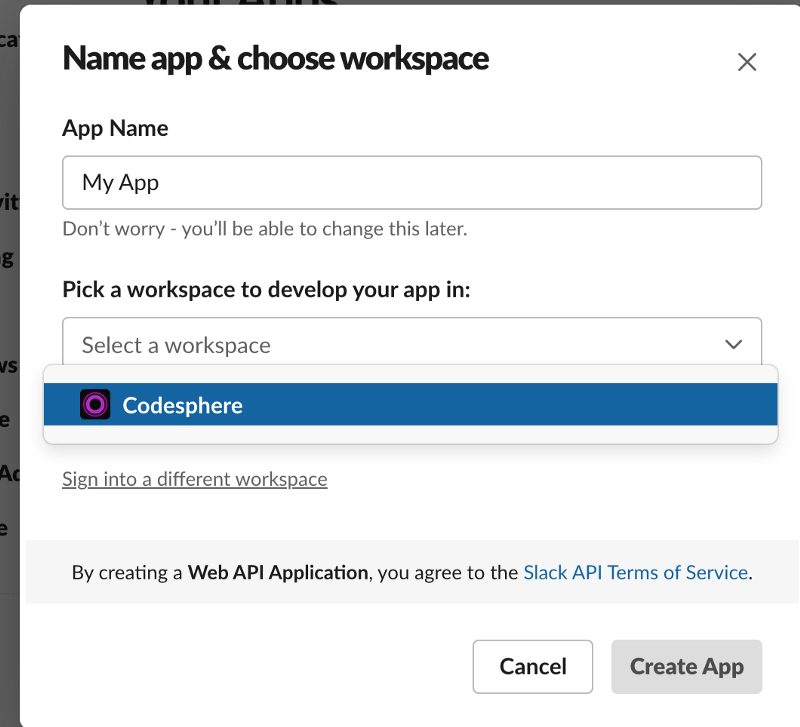
Name your app and pick the workspace you want to test it in.
From there, there are a number of settings that we are going to edit.
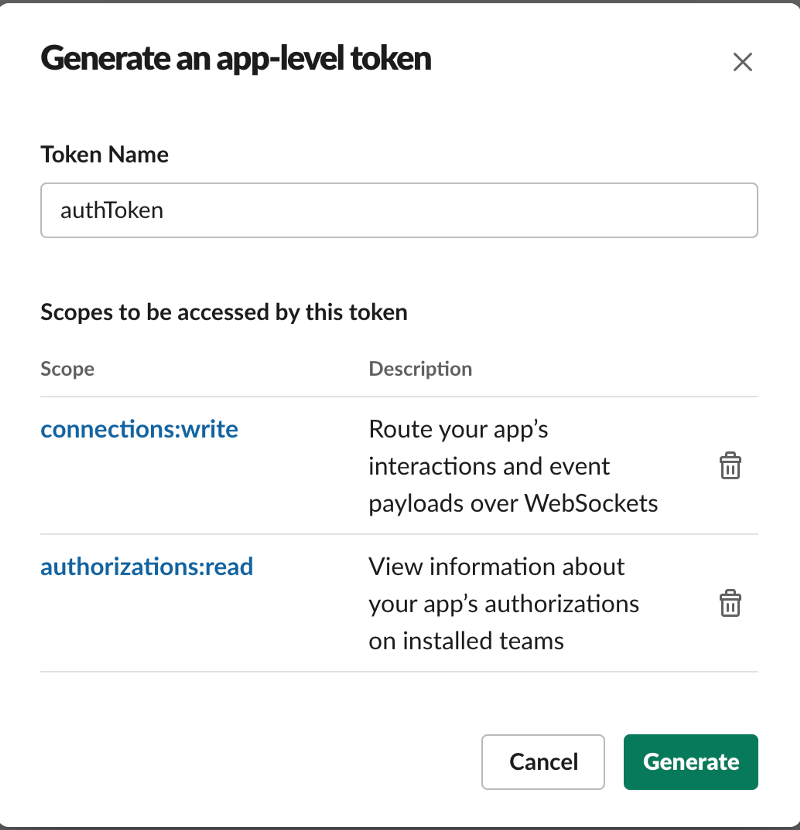
First, in Basic information, go to App-Level Tokens and generate a new Token. Give this token the scopes “connections: write” and “authorizations: read”
Next, go to Socket Mode and enable Socket Mode. This will allow us to connect to the Slack API with WebSockets. If you are publicly distributing your Slack App you are going to want to host it somewhere. More on that later.
Next, go to OAuth & Permissions, and find the Scopes section. Add the following Bot Token Scopes. Depending on what you are doing you may want to add others, but for this tutorial, this is all we will need.
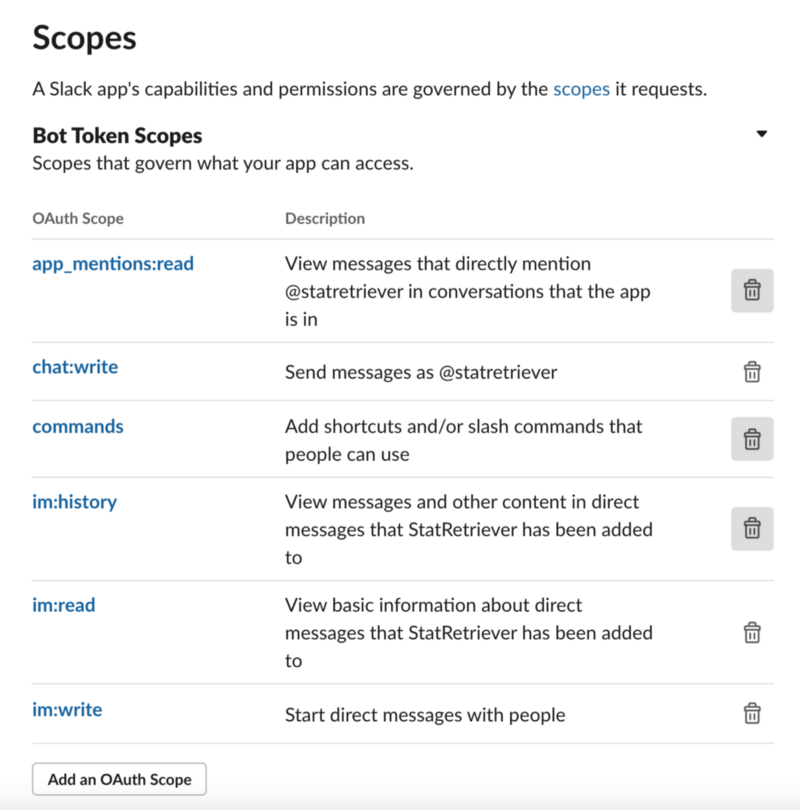
That’s all we need for configuration. Finally, we can initialize our app in index.js:
If we run this file and don’t get any errors, then we’ve successfully authenticated our app!
Slash Commands
The first way that we can add functionality to our Slack bot is by creating Slash commands. These are exactly what you might imagine. Someone in our workspace can simply type /command-name and call some sort of function.
To add a command, go to the Slash Commands tab in the Slack API dashboard and press “Create New Command”
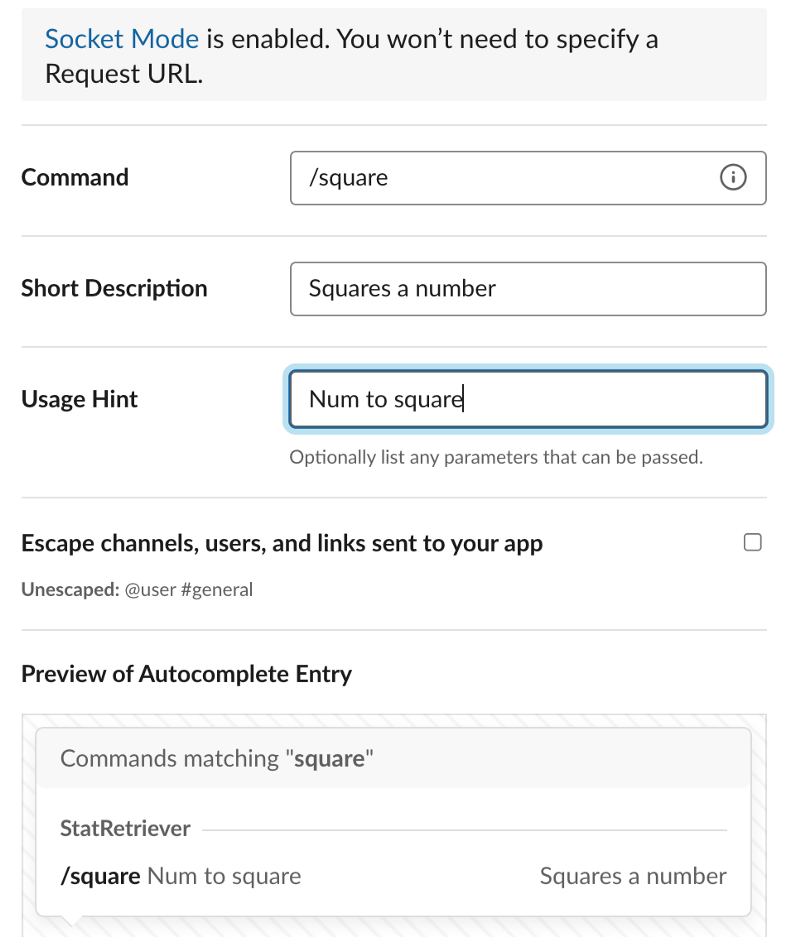
We can then add functionality to this command in index.js:
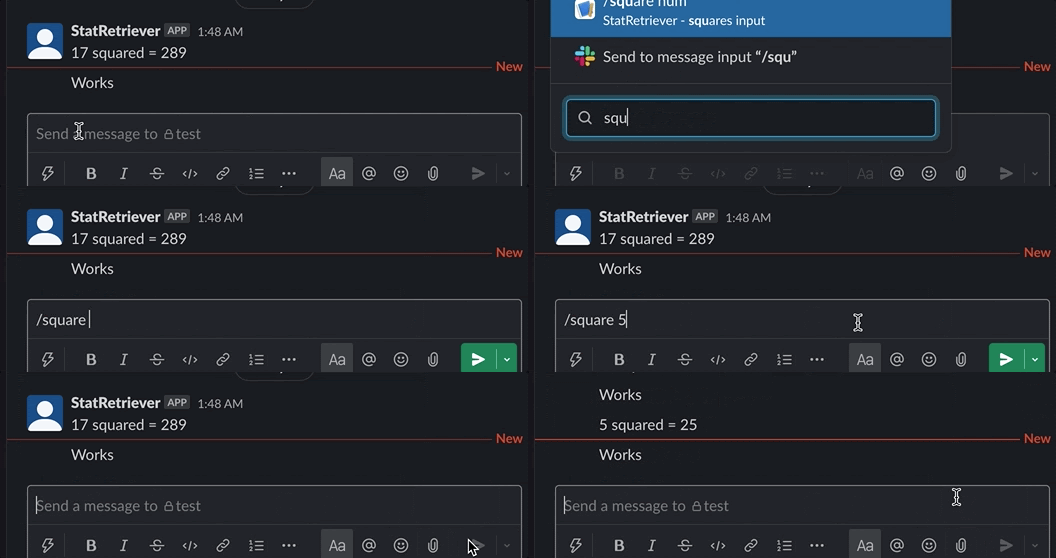
Once you reinstall the app to your workspace (which can be done from the oAuth & Permissions Tab), you can use it like so:
Handling Events
The next way we can add functionality to our Slack Bot is through events. An event can be anything from direct messaging our bot or a new user joining our workspace. We can set up our bot to listen to these events and do certain things when the event is triggered.
To set this up, go to the Events and Subscriptions tab and enable Events. From there, add
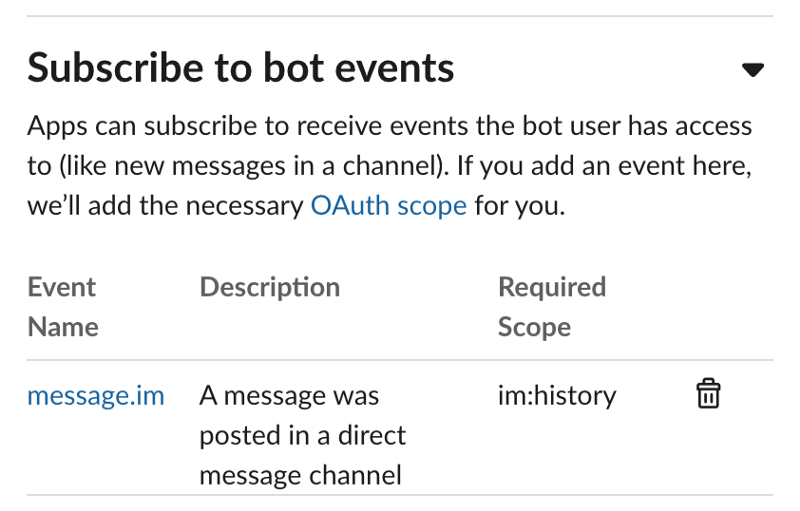
From there, we can add the following code to our index.js
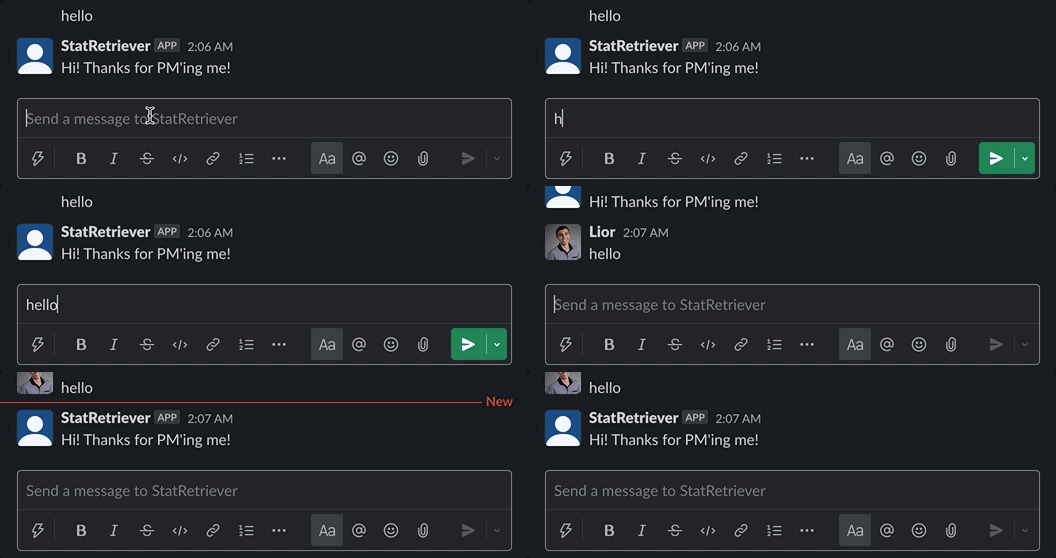
And use it like so (again don’t forget to reinstall the app to your workspace)
Using Slack Apps to Optimize Your Business Operations
Now obviously the examples we built here are pretty rudimentary, but the key thing to note here is that you can now interact with Slack however you want. This can allow you to build any number of tools such as:
- Commands to pull certain metrics (just pull from API’s in NodeJS)
- Run internal polls
- Find meeting availability
- Get progress reports (perhaps even integrate with Trello or Asana)
Now that the code is at your fingertips, anything you can do with NodeJS you can now do in Slack.
Publishing Your App
If you want to publish your bot so that anyone can integrate it into their workspace, you’re going to need to deploy it somewhere. If you’ve ever built a bot that requires live deployment, you know how difficult and time-consuming it can be to test your app in the cloud when you can only develop it locally.
At Codesphere, we’re building a cloud IDE so that you can code and deploy seamlessly. With Codesphere’s live test environment, you can make and test ad-hoc changes to your Slack bot instead of wasting time deploying after each minor change you make.
So what kind of bot are you going to build? Let us know down below!
Happy coding!
