Build your own VS Code extension
This blogpost is everything you need to get started with building your very own VS Code extension.


Visual Studio Code is a powerful code editor known for its extensibility. Users can install various extensions to fit their needs, and if something isn't available, they can build their own extensions to enhance productivity. To do this, an extension author needs to be familiar with the VS Code API and the development workflow for creating extensions.
In this blog post, we will show you the framework we used to build an extension using a webview to display anything you like. We will guide you through the development of an extension, where you can modify the project to do specific tasks, and finally, we will show you how to officially publish an extension on the VS Code Marketplace.
Preparation
The VS Code extension will be a TypeScript project, and for the webview, we will use Svelte as the frontend framework. We have prepared a VS Code extension development template so that you can clone this repository and get started right away:
GitHub repository: https://github.com/codesphere-cloud/vscode-extension-template
git clone https://github.com/codesphere-cloud/vscode-extension-template
cd vscode-extension-template
npm i
This will download the VS Code template and install all the dependencies you need for developing your extension.
That's it. You are ready to test and build your extension. First, we want to make sure that the tutorial extension works. When developing an extension, we want to test every change right away, and testing should be a smooth workflow.
We can open a debug VS Code window called Extension-Development-Host to test our extension. First, we run a command to compile our extension while working on it.
npm run watchTip: open a new Terminal with this Keyboard combination: Ctrl + Shift + `
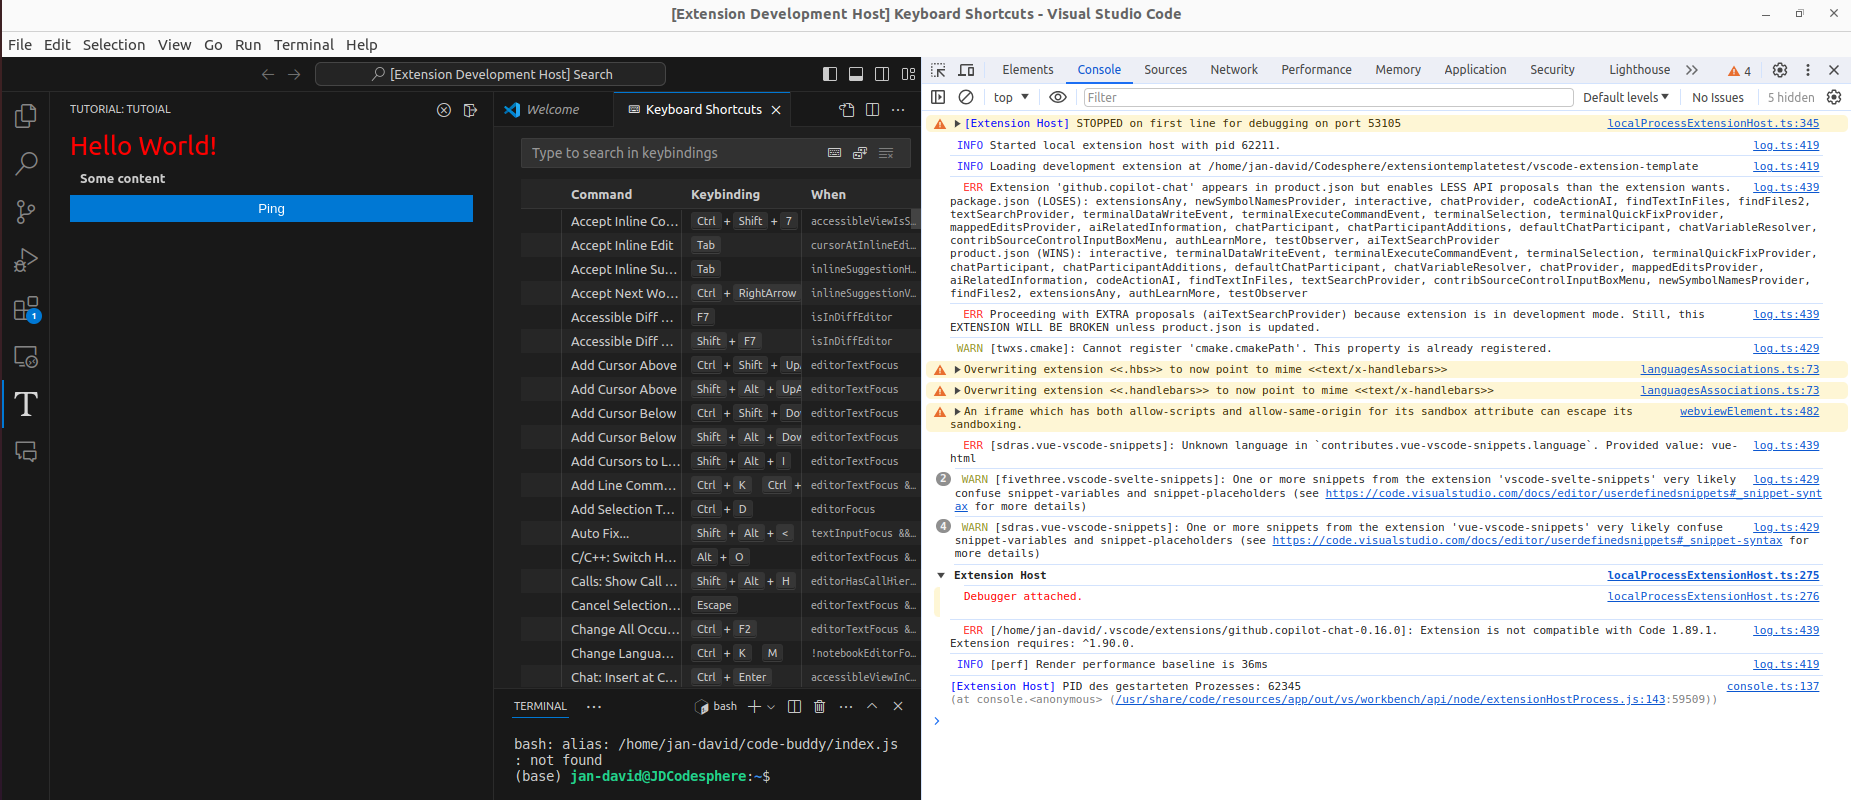
This compiles our extension every time we are changing our project. now we open either src/SidebarProvider.ts or src/extension.ts file and push F5 to open a new extension-developing-host. an this is the result:
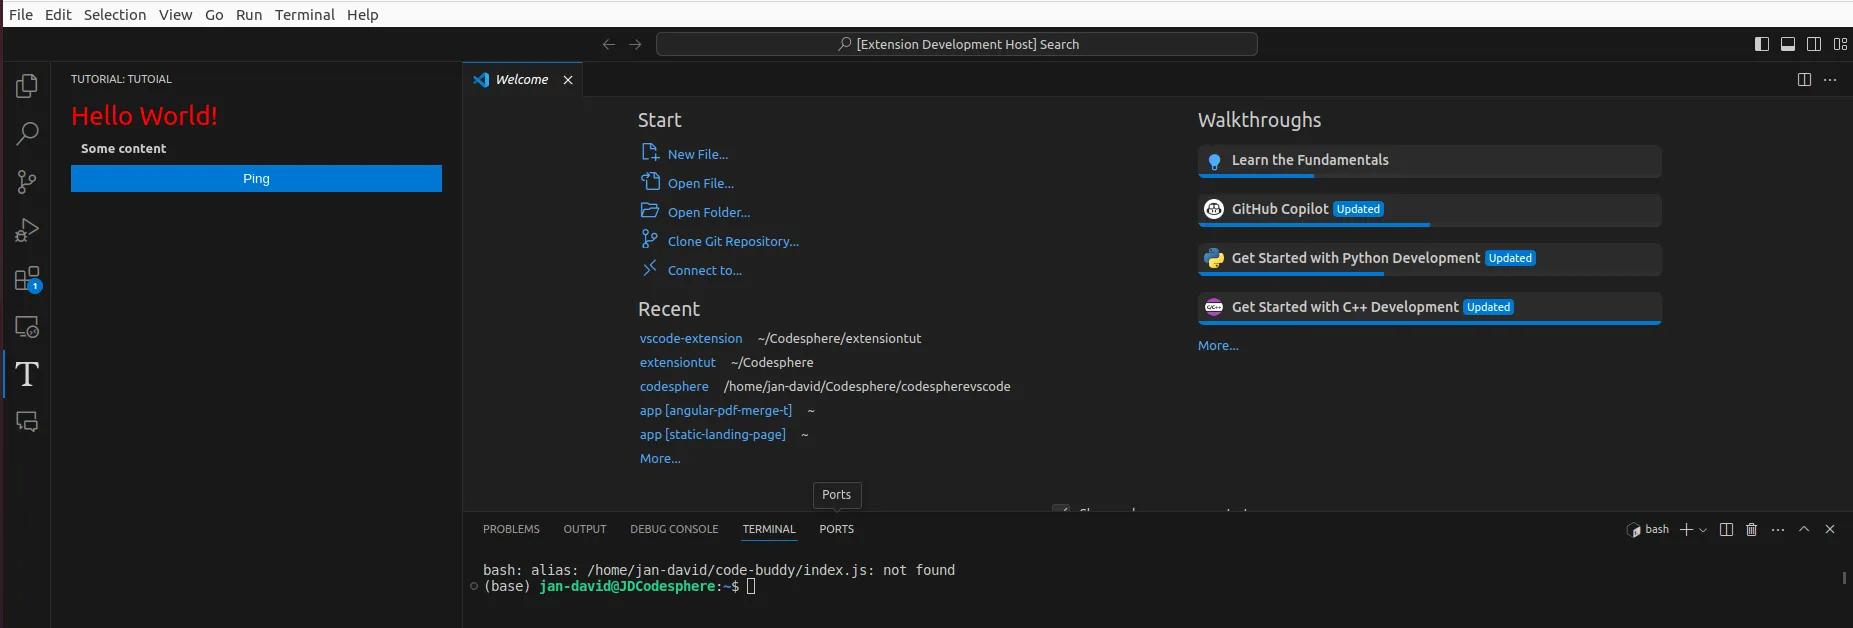
The template extension we provide adds a view to the activity bar on the side with a webview a user can interact with. We kept this tutorial template as simple as possible, so you can follow along with this tutorial and get to know the project better while adding new features to it.
This tutorial focuses on creating a webview in the side panel of VS Code, but you can do much more than that. In the last section of this blog post, we will list a bunch of links to useful resources for further reference.
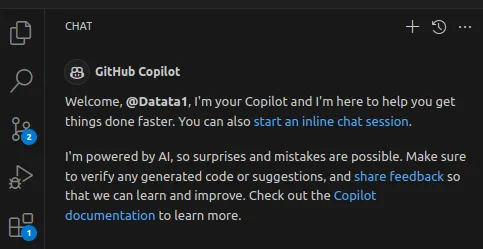
Now, we will build a GitHub Copilot-style chat interface together, but with a locally installed Llama.cpp.
Project idea
The idea is to replicate the GitHub Co-Pilot chat interface on VS Code but with a locally self-hosted Llama.cpp instance. The use case for this would be if you are working on a project which data should not be exposed to other services. Such an approach of using AI would be data compliant.
We need to set up our local Llama.cpp instance and use the server example of this repository to host our own OpenAI compatible chat completion, so we have a nice to use API. Now, we guide you through the process of setting up your locally installed Llama.cpp instance.
Firstly, you need to clone the GitHub repository of llama.cpp and build the project with make . Make sure that you are in the root directory of the extension:
git clone https://github.com/ggerganov/llama.cpp
cd llama.cpp/
make
Depending on your local resources this command might take while. After completion we can continue to set up the OpenAI compatible server:
cd examples/server
make server
Like before this might take a while. After building the server we need to download our model we want to use. The important thing is to use models in the .gguf format. You can browse avalable models on HuggingFace: https://huggingface.co/models?library=gguf&sort=trending
We chose the qwen2-7b-instruct-q8_0.gguf model: https://huggingface.co/Qwen/Qwen2-7B-Instruct-GGUF/tree/main
It is 8 GB and to download it takes a while. You can download it to your models/ directory in your root:
cd models/
wget https://huggingface.co/Qwen/Qwen2-7B-Instruct-GGUF/resolve/main/qwen2-7b-instruct-q8_0.gguf?download=true
Simply replace this link with the link to the model you want to use. Now, you need to wait until this model is downloaded.
When downloading is finished you can use this model right away. Execute this command in the root directory of llama.cpp:
chmod a+x ./server
./server -m models/qwen2-7b-instruct-q8_0.gguf -c 2048
And again, if you chose an other model replace the path to the model to the right file.
You can now use the Llama.cpp interface on localhost:8080
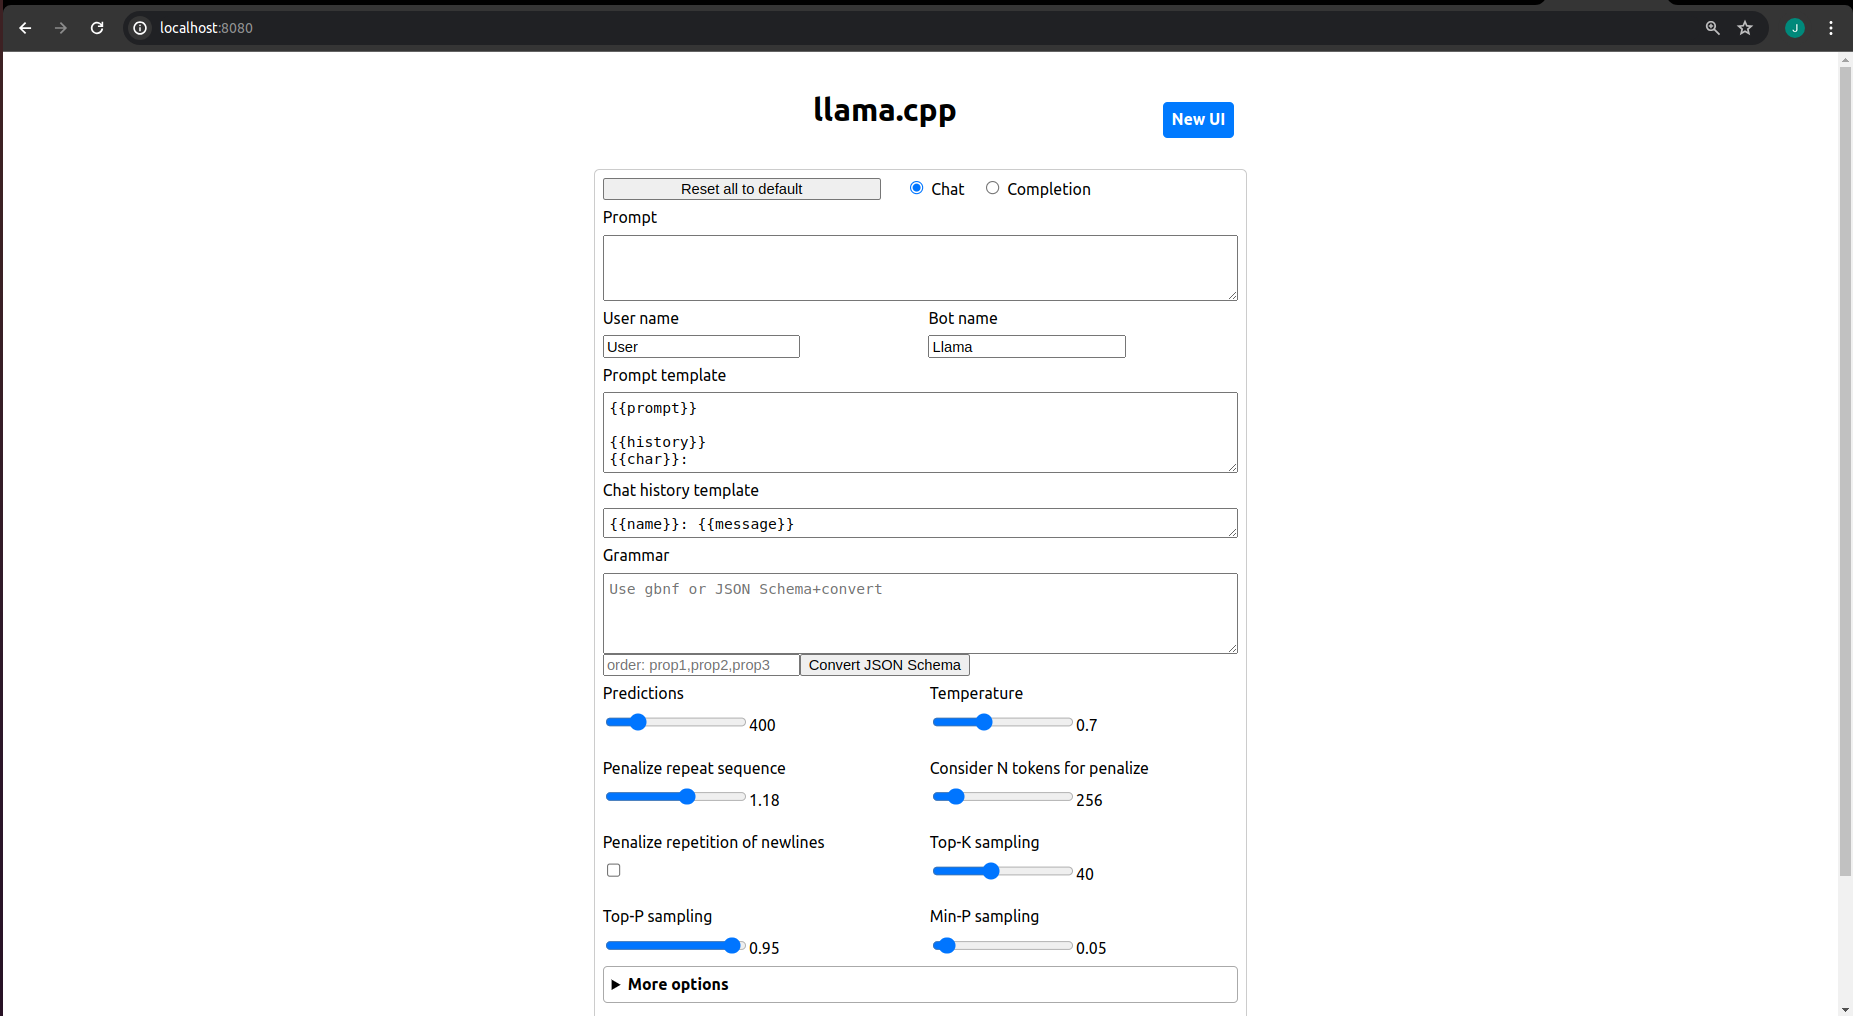
You can for sure optimize the performance of the model running now on your localhost, but lets stick with this for this tutorial because we want to build a VS Code extension.
Since we are using the API we wont need that UI. Here is a documentation about the API: https://github.com/ggerganov/llama.cpp/tree/master/examples/server#API-Endpoints
Features to add
Inside our sidepanel extension we want to add these features:
- start your AI model out of VS Code
- place an input field for your prompts
- use the completion endpoint of our model to generate a response
- display the response to our webview
We want to keep this extension simple and if you want to you can take the challenge and improve it as you like! 🤗
Creating a Button to Start and Stop Llama.cpp
Let's create buttons so that we don't have to type the command in the terminal every time we want to use our Llama instance. Additionally, it would be convenient to have a button to stop the model from running, as we don't want to manually find out the PID in order to kill the process.
The idea is to add icons to the top-right corner. Perhaps you're familiar with some extensions that have these small icons in the top-right corner (e.g., GitHub Co-Pilot).
To add these buttons, we need to modify our package.json file first. The package.json file in our project is an important file filled with various metadata about your extension. This file serves as one of the main entry points to your extension. Inside the package.json, there is a field called menus. We will add two additional icons to our existing icon by appending these objects to that array.
"menus": {
      "view/title": [
        {
          "command": "tutorial.tutorial",
          "when": "view == tutorial-sidebar",
          "group": "navigation"
        },
        {
          "command": "tutorial.start",
          "when": "view == tutorial-sidebar && !tutorial.modelIsRunning",
          "group": "navigation"
        },
        {
          "command": "tutorial.stop",
          "when": "view == tutorial-sidebar && tutorial.modelIsRunning",
          "group": "navigation"
        }
      ]
    },
In the when attribute, you can specify conditions for when the icons should be displayed. We can control variables through the VS Code API. We want the start icon to be displayed when the model is not running, and when it is running, we want to display the stop button.
We aim to use small icons for these commands. There is a variety of internal icons available for use: Icon Listing
In our package.json file, there is a commands field where we can add such icons. You can simply copy this snippet and replace it with the existing one:
"commands": [
      {
        "command": "tutorial.tutorial",
        "title": "tutorial",
        "icon": "$(log-out)",
        "category": "Tutorial command"
      },
      {
        "command": "tutorial.start",
        "title": "Start",
        "icon": "$(play)",
        "category": "Tutorial command"
      },
      {
        "command": "tutorial.stop",
        "title": "Stop",
        "icon": "$(stop)",
        "category": "Tutorial command"
      }
    ]
Now we save with Ctrl + S and navigate to our Extension Development Host, then press Ctrl + R to refresh the window. You should now see the icons displayed in the top-right corner.
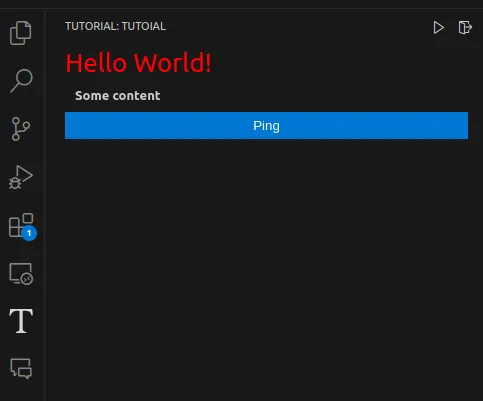
Perhaps you noticed that the stop button is not displayed. This is because of the condition we provided in the package.json.
Now let's code the commands that are executed when clicking on these icons. We need to open the src/extension.ts file to register our commands with the extension. We register the commands in the activation function of this file. In our package.json, there is a field named activationEvents where we can specify when the activation function is executed.
"activationEvents": [
    "onStartupFinished"
  ],
The activation event is set to onStartupFinished. This means the activation function is executed when VS Code is fully loaded. You can copy this code snippet and paste it into extension.ts:
context.subscriptions.push(
  vscode.commands.registerCommand('tutorial.start', async () => {
    vscode.commands.executeCommand('setContext', 'tutorial.modelIsRunning', true);
  })
);

context.subscriptions.push(
  vscode.commands.registerCommand('tutorial.stop', async () => {
    vscode.commands.executeCommand('setContext', 'tutorial.modelIsRunning', false);
  })
);
Now, when you reload the Extension Development Host with Ctrl + R, you can test these icons, and you will notice that after clicking, the icon changes. This is the result of using the condition. We can change the context for the modelIsRunning variable during the runtime of your extension.
Now, we actually want to add functionality to our buttons. We can do that by simply extending the registerCommand() code block with the logic we want to have.
We want to start our LLama.cpp instance when clicking start and stop it when clicking stop. We need to execute these bash commands. You can again simply copy and paste this code snippet into the code you already have:
a) start Llama.cpp on localhost:8080:
context.subscriptions.push(
  vscode.commands.registerCommand('tutorial.start', async () => {

    const extension = vscode.extensions.getExtension('Tutorial.tutorial')?.extensionPath;

    // Your Llama.cpp folder has to be inside the extension folder
    const serverPath = path.join(extension, 'llama.cpp', 'server');
    const modelPath = path.join(extension, 'llama.cpp', 'models', 'qwen2-7b-instruct-q8_0.gguf');
    const bashcommand = `${serverPath} -m ${modelPath} -c 2048`;

    const test = 'echo hi';

    exec (bashcommand, (error, stdout, stderr) => {
        if (error) {
            console.error(`exec error: ${error}`);
            return;
        }

        if (stderr) {
            console.error(`stderr: ${stderr}`);
            return;
        }

        console.log(`stdout: ${stdout}`);
    });
    vscode.commands.executeCommand('setContext', 'tutorial.modelIsRunning', true);
  })
);
Note: We will save the PID (process ID) of the process to our extension's globalStorage to ensure that we can kill this process with our extension's stop button. The globalStorage can be used for state management in our extension.
b) stop Llama.cpp server:
context.subscriptions.push(
    vscode.commands.registerCommand('tutorial.stop', async () => {
        const pid = context.globalState.get("codesphere.runningPID");
        console.log(pid)

        const bashcommand = `kill ${pid as number + 1}`;

        const childProcess = exec(bashcommand, (error, stdout, stderr) => {
            if (error) {
                console.error(`exec error: ${error}`);
                return;
            }

            if (stderr) {
                console.error(`stderr: ${stderr}`);
                return;
            }

            console.log(`stdout: ${stdout}`);
        });

        context.globalState.update("codesphere.runningPID", "");
        vscode.commands.executeCommand('setContext', 'tutorial.modelIsRunning', false);
    })
);
We loaded the PID from our globalStorage and used it to terminate the correct process. And there we have it! Now we can start and stop our local Llama.cpp model as needed.
Tip: We actually have a webview developer console inside the extension development host to debug our extension. You can open it as follows:
Ctrl + Shift + P- select
Developer: Open Webview Developer Tools
Place an input field to our webview
The user needs to place the prompt somewhere. Let's create the UI for that within our Svelte file. For that, we simply need HTML, CSS, and JavaScript for the functionality.
In our Svelte file, we have a <script> tag for JavaScript code and a <style> tag for CSS. In the rest of the file, you can place the HTML code. Let's keep it simple, and if you want, you can practice your UI/UX design by enhancing this code as you like.
Add the following two code snippets to src/webviews/components:
a) CSS
.prompt-container {
        display: flex;
        align-items: center;
        padding: 10px;
        width: 100%;
        max-width: 600px;
        margin: 0 auto;
        position: fixed;
        bottom: 0;
        left: 0;
    }

    .prompt-input {
        flex: 1;
        padding: 10px;
        border: none;
        outline: none;
        font-size: 16px;
    }

    .prompt-button {
        display: flex;
        justify-content: center;
        align-items: center;
        padding: 10px 20px;
        font-size: 16px;
        border: none;
        cursor: pointer;
        border-radius: 4px;
        margin-left: 10px;
        width: 50px;
        height: 50px;
        align-self: end;
    }
b) HTML
<div class="prompt-container">
<textarea type="text" placeholder="Ask your model something about your code" wrap="hard" class="prompt-input"></textarea>
<button class="prompt-button">
<svg xmlns="http://www.w3.org/2000/svg" width="100px" height="100px" viewBox="0 0 16 16">
<path fill="currentColor" fill-rule="evenodd" d="m4.25 3l1.166-.624l8 5.333v1.248l-8 5.334l-1.166-.624zm1.5 1.401v7.864l5.898-3.932z" clip-rule="evenodd"/>
</svg>
</button>
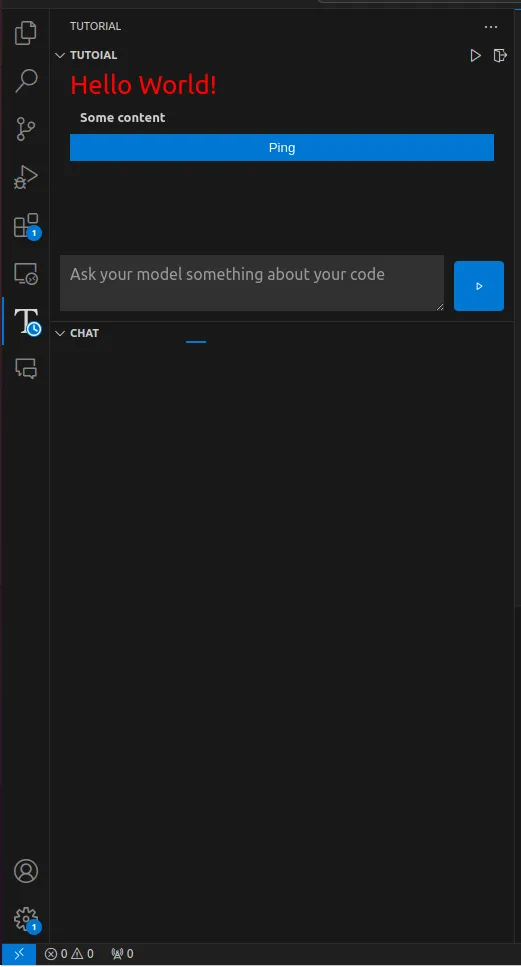
</div>And this is the result:
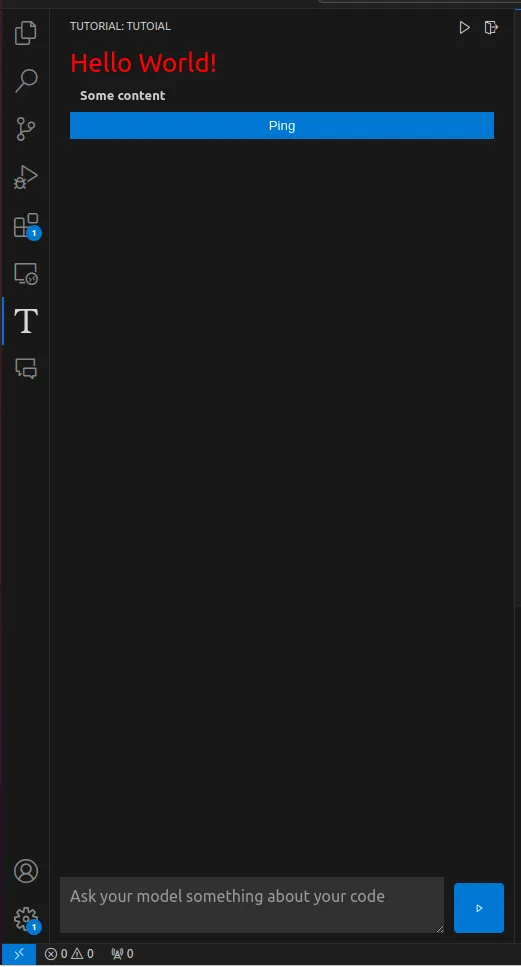
As you can see, we didn't add a color to our button, but it's blue. That's because in our project, we have some standard VS Code styles imported. You can find the styles in the media directory of our project.
Split the webview to two different sections
It's time to split up our webview since the HelloWorld template has nothing to do with our chat interface. We can have multiple webviews in our sidebar simultaneously, like an accordion, where you can open and close the different webviews as you like.
"views": {
      "tutorial-sidebar-view": [
        {
          "type": "webview",
          "id": "tutorial-sidebar",
          "name": "Tutoial",
          "icon": "media/tutorial.svg",
          "contextualTitle": "Tutorial"
        },
        {
          "type": "webview",
          "id": "tutorial-chat",
          "name": "Chat",
          "icon": "media/tutorial.svg",
          "contextualTitle": "Chat"
        }
      ]
    },
With that simple trick we created a second webview window inside our sidebar:
The content in our new chat window is loading infinitely because we haven't registered content for that window in our extension. Let's change that by adding code in src/extension.ts:
const chatProvider = new ChatProvider(context.extensionUri, context);
context.subscriptions.push(
  vscode.window.registerWebviewViewProvider(
  "tutorial-chat",
  chatProvider
  )
);
Now, when you refresh the extension development host, you will see that the content is loaded into the second webview. The reason this works without adding extra files is that we provided the necessary files in the template. Here is a list of the files you need to add to register this new webview:
ChatProvider.tsin/srcChat.svelteinwebviews/componentschat.tsinwebview/pages
If you are about to create another webview and you are using our SidebarProvider.ts as a template for that, you need to change the compiled JavaScript and CSS files to the correct ones.
const styleResetUri = webview.asWebviewUri(
      vscode.Uri.joinPath(this._extensionUri, "media", "reset.css")
    );
    const scriptUri = webview.asWebviewUri(
      // change here
      vscode.Uri.joinPath(this._extensionUri, "out", "compiled/chat.js")
    );
    const styleMainUri = webview.asWebviewUri(
      // change here
      vscode.Uri.joinPath(this._extensionUri, "out", "compiled/chat.css")
    );
    const styleVSCodeUri = webview.asWebviewUri(
      vscode.Uri.joinPath(this._extensionUri, "media", "vscode.css")
    );
Add functionality to our chat-interface
Now we have our UI, but we need the logic for handling our prompts and displaying the response. In order to do that, we need to send our prompt to our model via the API and send the response to our webview so that we can display it. It follows the same pattern when implementing logic for our extension:
- Send data from the webview to our extension via the postMessage method.
- Handle the message within our extension's code (e.g., ChatProvider.ts) inside the switch-case block.
- Send back data to our webview with the postMessage method.
First, we define a function to forward our prompt to the extension and add this prompt to our chat interface. You can replace the someMessage() function with the following code:
function someMessage() {
    // Clear the textarea
    document.getElementById('promptInput').value = '';

    // add textblock to chat interface
    const chat = document.createElement('div');
    let randomId = generateRandomId();
    chat.innerHTML = `<div style="  background-color: #00BCFF;
                                    color: black;
                                    padding: 10px;
                                    margin: 10px;
                                    border-radius: 10px;
                                    display: inline-block;">${prompt}</div>`;
    document.getElementById('chatContainer').appendChild(chat);

    // Create response div
    const responseDiv = document.createElement('div');
    // styling
    responseDiv.style = "background-color: #6F40D3; color: black; padding: 10px; margin: 10px; border-radius: 10px; display: inline-block;";
    responseDiv.id = randomId;
    document.getElementById('chatContainer').appendChild(responseDiv);

    vscode.postMessage({
        type: 'prompt',
        value: {
            prompt: prompt,
            id: randomId
        }
    });
}
The postMessage() method will send a message to our extension, and the type property of the message body will serve as the identifier for which case in our switch-case code block will be executed within the ChatProvider.ts.
webviewView.webview.onDidReceiveMessage(async (data) => {
      switch (data.type) {
        case "prompt": {
          if (!data.value) {
            return;
          }

          let prompt = data.value.prompt;
          let id = data.value.id;

          const Test = async (prompt: string, id: any) => {
            try {
              let response = await fetch("http://127.0.0.1:8080/completion", {
                method: 'POST',
                headers: {
                  'Content-Type': 'application/json',
                },
                body: JSON.stringify({
                  prompt,
                  n_predict: 30,
                  stream: true,
                }),
              });

              if (!response.ok) {
                throw new Error(`HTTP error! status: ${response.status}`);
              }

              if (!response.body) {
                throw new Error('Response body is null');
              }

              const reader = response.body.getReader();
              const decoder = new TextDecoder();
              let result = '';

              while (true) {
                const { done, value } = await reader.read();
                if (done) {
                  break;
                }
                result += decoder.decode(value, { stream: true });

                const lines = result.split('\n');
                for (const line of lines) {
                  if (line.startsWith('data:')) {
                    try {
                      const json = JSON.parse(line.substring(5).trim());
                      console.log(json.content);
                      let token = json.content;
                      this._view?.webview.postMessage({
                        type: "response",
                        value: token,
                        id: id
                      });
                    } catch (e) {
                      console.error('Error parsing JSON:', e);
                    }
                  }
                }
                result = lines[lines.length - 1];
              }

              this._view?.webview.postMessage({
                type: "response",
                value: "done",
                id: id
              });
            } catch (error) {
              console.error('Error:', error);
            }
          };

          await Test(prompt, id);

          break;
        }
      }
    });
This will handle our request to our running LLM. We call it in stream mode, which means that every token is sent separately back. Every time we get a token, we send this token back to our extension via the postMessage method so that we can add it to our chat interface within the webview's code.
onMount(() => {
window.addEventListener('message', event => {
const message = event.data; // The JSON data our extension sent
console.log(`message received: ${JSON.stringify(message)}`);
switch (message.type) {
case 'response':
if (message.value === 'done') {
// Mark the end of the response
break;
}
let responseDiv = document.getElementById(message.id)
responseDiv.innerHTML += message.value;
break;
}
});
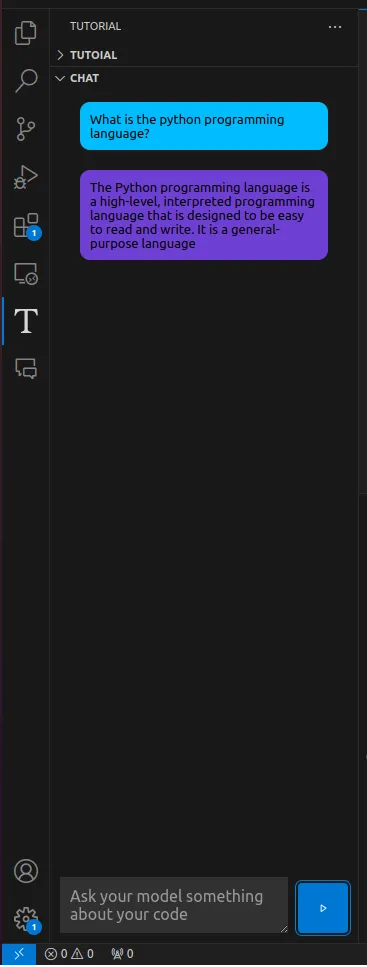
});Now we can have a chat with our locally hosted LLM.
Publish an extension
When we decide that our extension is ready to be published, we can do so using the vsce CLI tool for managing VS Code extensions.
Fist we need to install the vsce CLI:
npm install -g @vscode/vscePackaging your project to a .vsix file is the easiest way to share your extension. You need to run this command in the root directory of your project:
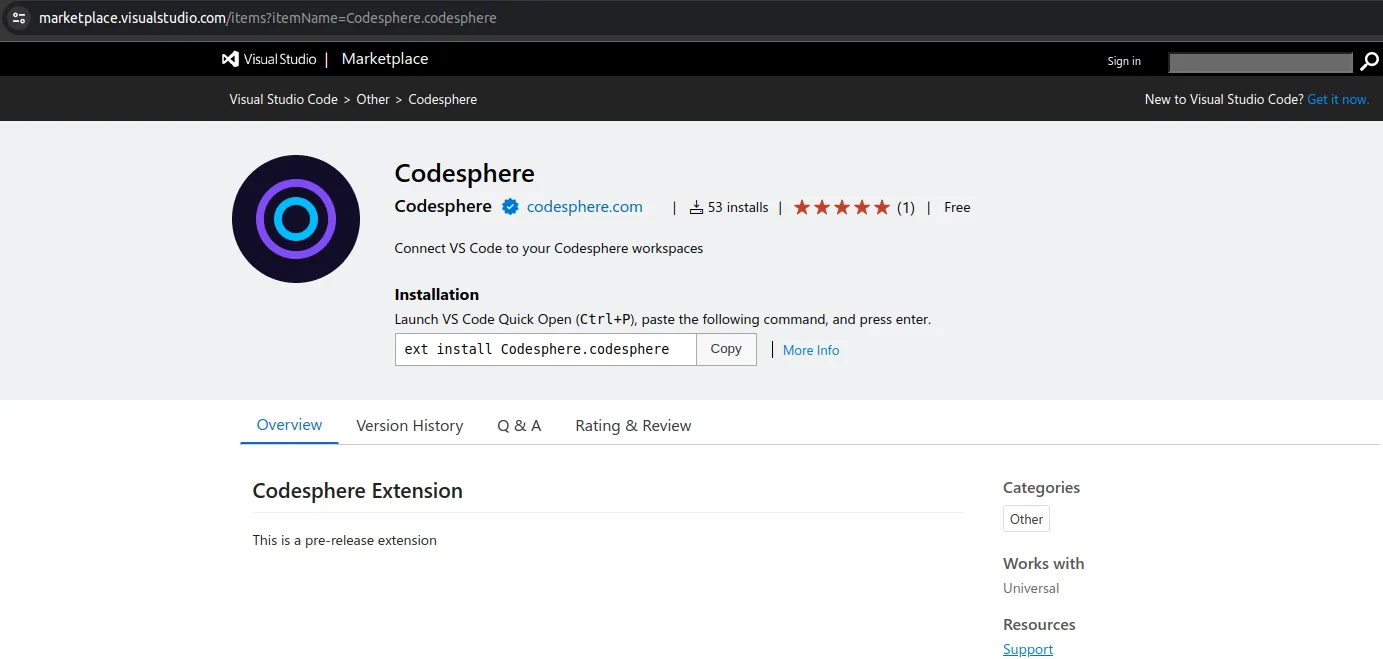
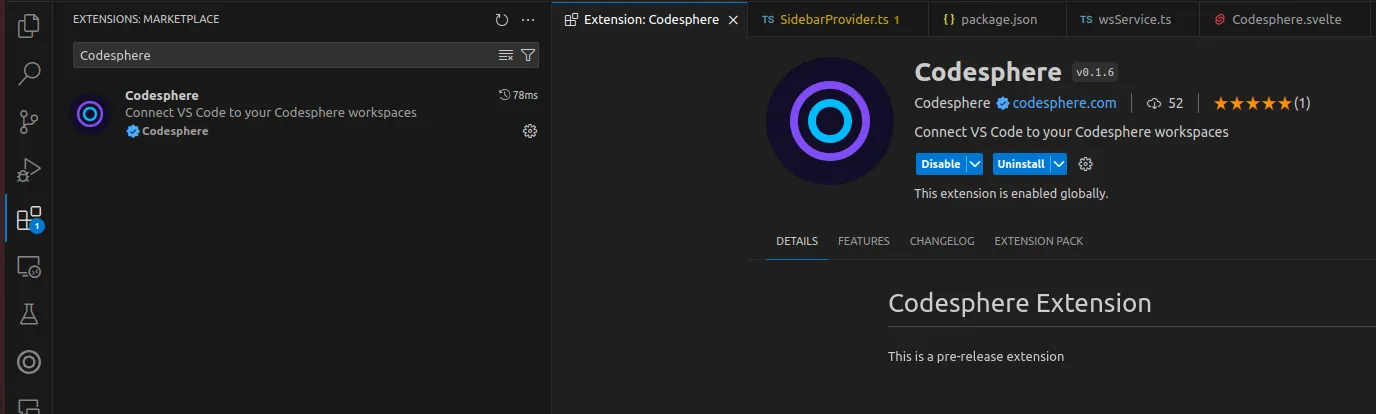
vsce packHowever, since it's not always trustworthy to share files directly, we might want to publish our extension in the official VS Code Extension Marketplace. Since Microsoft's official documentation for publishing extensions is clear, we will just reference their documentation here: Publishing Extension.
Once you've completed everything and your extension is accepted, it will be listed and available for other users to install.
Further links
This is a list of links which were useful to us when building our own VS Code extension (will be updated when finding good reference in the ):
- Youtube tutorial (Ben Awad): https://www.youtube.com/watch?v=a5DX5pQ9p5M&list=WL&index=1
- Genral information: https://code.visualstudio.com/api
- Commands: https://code.visualstudio.com/api/extension-guides/command
- Webviews: https://code.visualstudio.com/api/extension-guides/webview
- Build-in commands: https://code.visualstudio.com/api/references/commands
- Activation events: https://code.visualstudio.com/api/references/activation-events
- about package.json: https://code.visualstudio.com/api/references/extension-manifest
- publishing extensions: https://code.visualstudio.com/api/working-with-extensions/publishing-extension
Conclusion
This tutorial serves as a comprehensive guide for creating a Visual Studio Code extension from scratch. We utilized the template provided to build an extension that interacts with a running Llama.cpp instance on localhost:8080. While this tutorial covers a lot, there are many more possibilities to explore when creating VS Code extensions, but covering all of them would be too much for one blog post.
If you're interested in building your own VS Code extension, you can join our Discord Server to connect with fellow software developers, Codesphere users, and the Codesphere team: Discord Server.
Furthermore, if you want to improve this tutorial extension, there are plenty of things you can do! It's a great project to practice your coding skills and your VS Code extension creation skills. Here are some ideas for improvement:
- Persistent Chats: Implement a feature to save chat histories or conversations between sessions.
- Creating a HuggingFace LLM Browser as a Separate Webview to Download Models: Develop a separate webview interface where users can browse and download models from HuggingFace.
- Fine-Tune Prompt Settings or Create a UI for User Settings: Allow users to fine-tune prompt settings or provide a user-friendly UI for configuring settings related to the extension.
- Improve UI/UX: Enhance the user interface and experience of the extension to make it more intuitive and visually appealing.
- User-Friendly Installation of Llama.cpp: Simplify the installation process of Llama.cpp for users, possibly by automating or providing clear instructions within the extension.
- Improve Model Performance Depending on User's Hardware: Implement optimizations to enhance the performance of the model, taking into account the hardware specifications of the user's machine.
- Implement Error Handling: Develop mechanisms to handle errors gracefully, providing meaningful error messages and guiding users on how to resolve issues when they occur.
- Cross-Platform Compatibility: Ensure that the extension functions smoothly on the Mac, Linux, and Windows operating systems.